So I'm a little bit thrifty. Note to all you rich people out there: that means I'm poor but I refuse to be labeled as such! And I have about 8 million family members on my shopping list. But just because you are not loaded doesn't mean you can't give nice gifts! Enter the Easy Lined Zipper Pouch!
 |
| You love my spiffy bath towel backdrop, right? Yeah that was the first thing I grabbed from the linen closet. |
Now some of you might be intimidated by this project. Let me assure you, if you own a machine, can thread it, and make it stitch, you can make these. Even the zippered part. I promise, they aren't hard in the least!
Here's what you're gonna need materials wise:
- 2 coordinating fabrics (or just one if you are making the lining the same as the outside of the bag)
- Cut these into 9" x 6" rectangles
- Fusible Interfacing (you can use sew-in if you really want but if you are just starting out I'd go with fusible)
- Cut into 9" x 6" rectangles unless it's a fleecy kind - if it's really thick go with 8 1/2" x 5 1/2")
- 12 inch zipper (shorter if you are brave, but don't specifically buy one longer than that for this project)
- Matching thread
Important Note #2: I have modified the way I make these several times now, but there are definitely 2 main places I first got the idea from. Always cite your sources, people! Go here or here to check out my inspirations (as well as their other projects!).
Ok, let's get started!
I don't really know how long it takes me to make these because I do them en masse now when I have some spare time and I can crank them out pretty fast. So I'd say less than an hour for a novice, maybe 25-30 minutes for someone with more experience.
The first thing you want to do after you've cut out your pieces is to fuse your interfacing to the back of your exterior fabric. The interfacing will make your bag more stable and give your finished product a more finished look. If you are skipping the interfacing (because you are afraid to ask the lady at the fabric store where it is), at least starch the heck out of the exterior. Floppy bags are not impressive bags!
 |
| Four pieces cut, interfacing fused, zipper picked out, machine threaded. Let's get to going! |
Now you are going to make one side of the bag. You're going to make a zipper sandwich. Put your lining right side up, then put your zipper teeth side up. The top of the fabric should line up with the top of the zipper.


 |
| I hate pinning. It's the worst part of sewing. But it's better than seam ripping. Ugh I REALLY hate seam ripping. |

Yay! Open up that little sandwich you just made! So pretty!

Now you need to press the fabrics away from the zipper. Just fold them with wrong sides together and press.

Repeat what you just did, but with the 2 remaining pieces. Lining right side up, top of the zipper, Exterior wrong side up. This time it's super important to make sure that the top of the second lining piece is lined up with the first one and the same with the second exterior piece. Otherwise it's gonna get real dicey when you go to stitch them together a few steps down from here.
 |
| Keep in mind that the 2 pieces you just finished will be inside the sandwich. Don't worry, you aren't going to be sewing over them. |
 |
| I always get frustrated when I can't see the back in the picture, especially if I'm not sure I'm doing it right. So I tried to make it easy for you! |
 |
| See how the zipper is open a bit? That's really important. Don't let your zipper pull get stuck outside your soon to be enclosed bag! |
 |
| You see how my lining doesn't match up perfectly? Sometimes that just happens. If it's not a significant amount, just go with it. You can trim it in the end and no one but you will ever know that it didn't turn out perfect. |
Sew all the way around the entire bag, both the interior and exterior pieces.
 |
| See that zipper? Girl, you just keep right on goin'! If you have to slow down, go ahead and slow down, but don't be afraid of that zipper! (These bags were where I finally conquered my fear of sewing over zipper teeth. It sounds worse than it is!) |
 |
| This gap is where you are going to turn out your bag |
 |
| Don't be afraid to cut that zipper! Unless you cut off the pull or something it will be just fine. You don't want bulky zipper teeth just hanging out inside your bag. |

Press the whole bag with the iron, and you are done! Look how nice that is! And people will say "You MADE that?!"


Go make a whole bunch, blog about it, and show me what you've got!
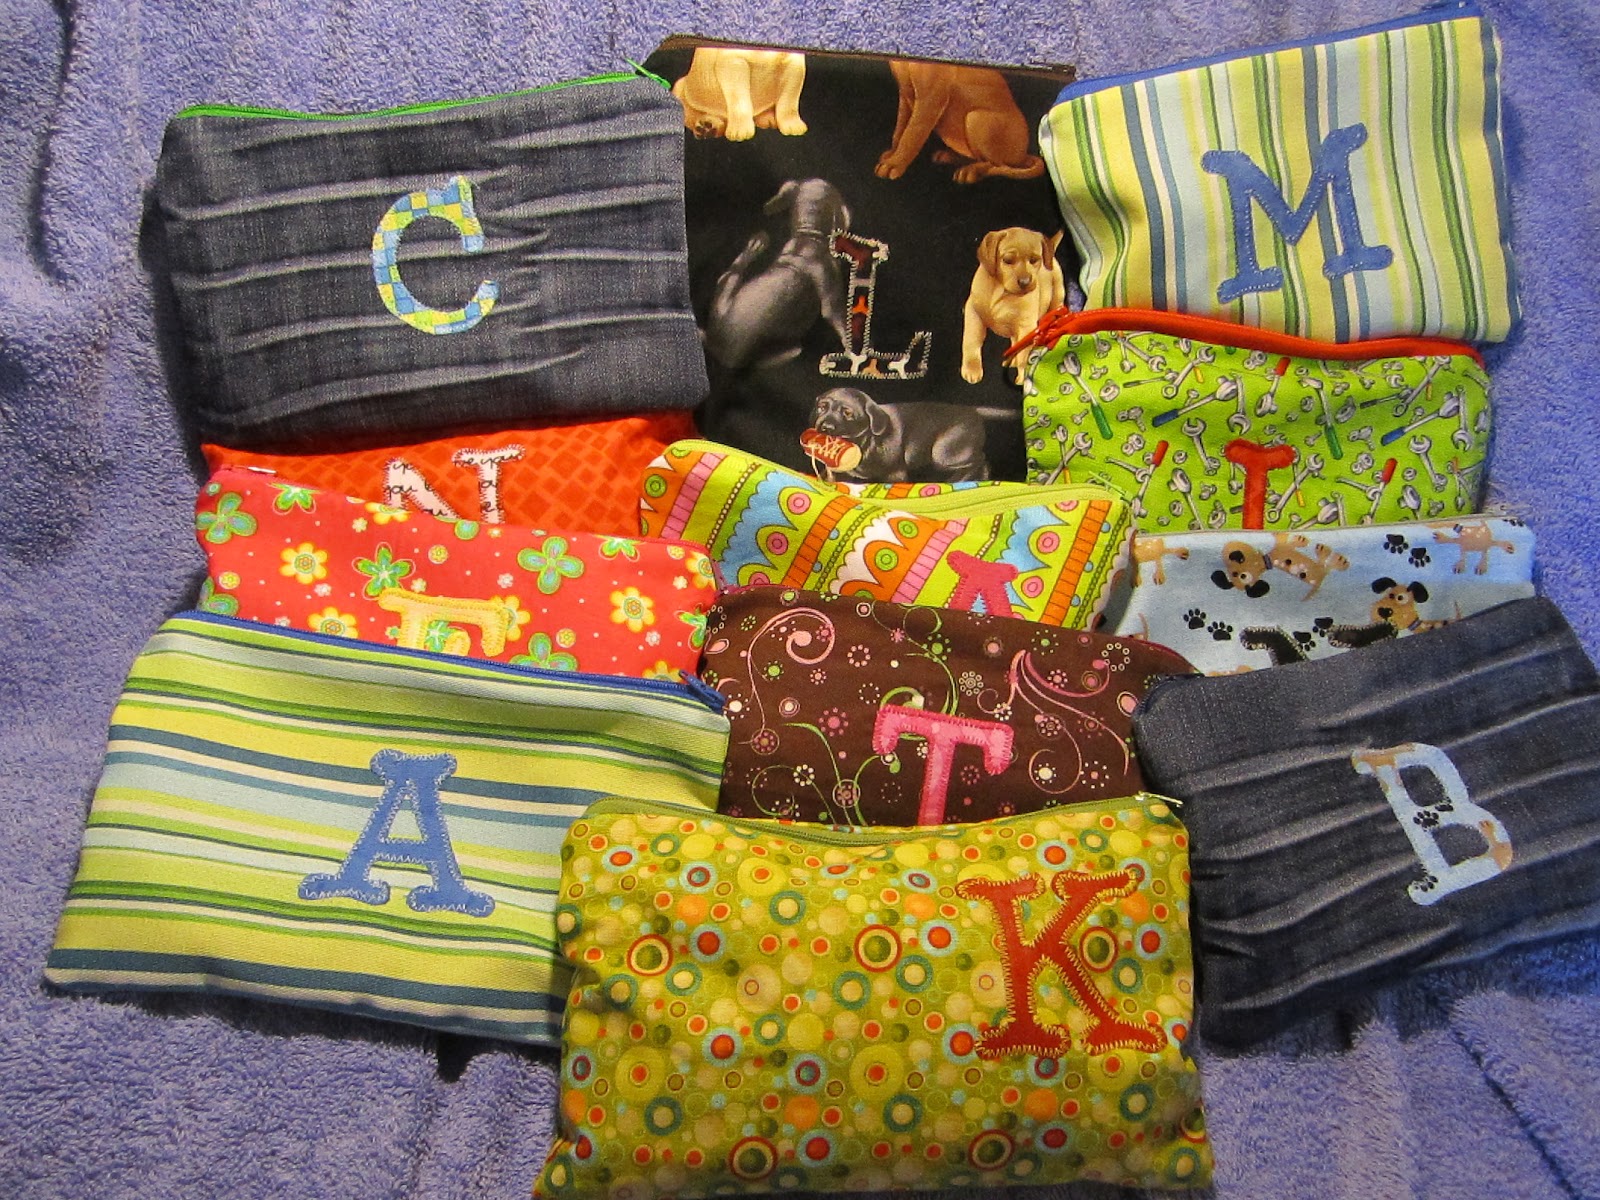
 |
| What's your favorite out of these? I like the ones made out of an old pair of jeans my kid outgrew. Or the stripey one. Or the flowers. Or all of them really. (They are so hard to give away when you love them all!) |
No comments:
Post a Comment
Leave me a comment. Please?! Seeing page view without knowing who was here drives me crazy! Not that *I* do that... >.>