Sunday, July 27, 2014

Open Letter #??

I was going back through my drafts and found this hidden gem from 2011. I don't remember writing it, but it must have been a REALLY bad day. To my FHE peeps, you know I really do love you and don't mind you being in my office at all. Well most of the time anyway! :P


Dear 5 People in the Hall Outside My Office,

I'm working. You know, that thing YOU are probably supposed to be doing right now. Except you are waiting to see the Principal or Assistant Principal. Guess what? She's working too! Go away!

Anyway, since you are out there/in here, let me point out a few key things to you:

  • This is not the complaint department. I cannot solve all your problems.
  • It's hard to balance budgets and pay invoices when you are telling me about your scam to cheat someone's insurance out of money cause that girl hit you the other night with her daddy's car.
  • My office is really not that big. You can't all fit in here.
  • One of you needs more deodorant and someone else needs less cologne.
  • I am totally writing an open letter on my blog to you while I am halfway pretending to listen to you gripe because I certainly can't focus on my JOB right now.


You People are Going to Drive Me to Drink and it's Only 9:30am,
Your Trapped in her Office Secretary

My Latest Adventure

You know those too-good-to-be-true ads you see all the time on Facebook? And how after a while FB gets so good at predicting what you like that the ads start to slowly win you over?

Well I've been stalking out Gwynnie Bee for quite some time due to that. since I've recently lost about 20 pounds and none of my clothes fit any more, I'm in the predicament of needing to acquire new clothes because the old ones are VERY ill fitting but not wanting to invest money in anything other than basics because I'm not where I want to be shape wise yet. 

So since Gwynnie Bee offers a 30 day free trial, I really have nothing to lose. So I signed up.

Monday, April 29, 2013

Prayers of my Children #1

"God, help us not to be enticed by evil but to look to you for help in all things."

Thomas, 4/29/13, in response to Proverbs 1.

Thursday, April 18, 2013

It's All in Your Perspective

I work with some amazing people. I really do. So it should come as no surprise that they have some amazing kids. One of these amazing kids is little M. She's in kindergarten this year.

After doing her homework, her mom told her to put it on the table and she would check it. Well imagine her mother's surprise when she found this:


Of course everyone had a good laugh over it. "But Moooooom, my teacher KNOWS pigs poop!" But it got me thinking. Here this little 5 year old was asked to draw a picture to show how she arrived at her answer. And she drew exactly what she visualized - a pen with 4 pigs in it is obviously going to contain some poop! And once she had her picture drawn, she was able to go look at the illustration and find the answer, which she got correct. But all the adults could focus on was the fact that she added pig poop to make her drawing more realistic.

How many times do we do that in every day life? We have a tendency to focus on what is wrong with the picture and not what is right. We want to completely change the picture, to make it more acceptable or correct. But what if in order to answer the question we need all the details, even the more unpleasant ones?

Sometimes you just have to look past the poop to solve the problem.

Wednesday, January 9, 2013

Photo Cube Block Puzzles

I really used to have free time once in a great while before Pinterest. Now I either pin stuff I want to do or do things I pinned.

Anyway, I saw these cute photo cube block puzzles and knew I'd have to make myself a set or 2 (or 3). I think I will take these to work and let the students play with them when they are chilling in my office.

You will need six 2" wooden cubes and six 4"x6" photos. You will also need Mod Podge, an applicator, a small sharp blade, and either a fan, hair dryer, or a LOT of spare time.

First, you are going to arrange your cubes into a 2x3 pattern. Then coat the tops with Mod Podge.

Put your picture on top of all 6 cubes and press firmly to get out any air bubbles. Then coat the top of your photo with a thin but even layer of Mod Podge.

Speed up the drying process with a fan or hair dryer. Or wait for a good long while for it to dry between steps.
Ignore all that gunk on my hairdryer. It's probably toothpaste. My kids can get toothpaste on ANYTHING.
 Now cut the blocks apart using your blade. Try to get it as exact as possible or they won't fit together as well in the end!

Flip the cubes to an uncovered face and repeat the steps until all 6 faces are covered. Then go back and recoat all the photos with Mod Podge because you may find they like to stick together if they aren't completely dry in between steps

Assemble your puzzle and enjoy! When you get bored with it, flip the pictures and you have something new to look at. Wouldn't these make fantastic gifts? And super cheap too - less than $1 to get the photos printed and maybe $5 for the blocks!
Yay! Now I can see 18 of my favorite pictures of them whenever I want!
*Stuff I didn't tell you:
1) I really hate Mod Podge. It gets EVERYWHERE! How do people use it and not have it stuck all over their hands? Maybe I just have no patience...
2) These things really do need a lot of drying time between steps. If you rush it, they are not going to turn out nearly as pretty as you want them to be.
3) I used real photos printed on real photo paper by a real photo counter (ok, the drugstore, but it wasn't home printed!) If you used regular paper on these you really want to make sure every thing is super dry before the next step. While I think you probably could make these with a thin paper, I also think they would tear super easy and you'd just be left with a gloppy mess.
4) My photography skills suck. I have discovered that this is what sets you apart on Pinterest - if you have an expensive camera and can take really good pictures, people will think you are an amazing crafter. I think everyone's projects really DO look just like yours does, they are just better at taking pictures to make it look perfect!

Saturday, December 29, 2012

Spook Towne, USA

(Yes, it's December and I'm posting about Halloween. I just went back into drafts and found this)

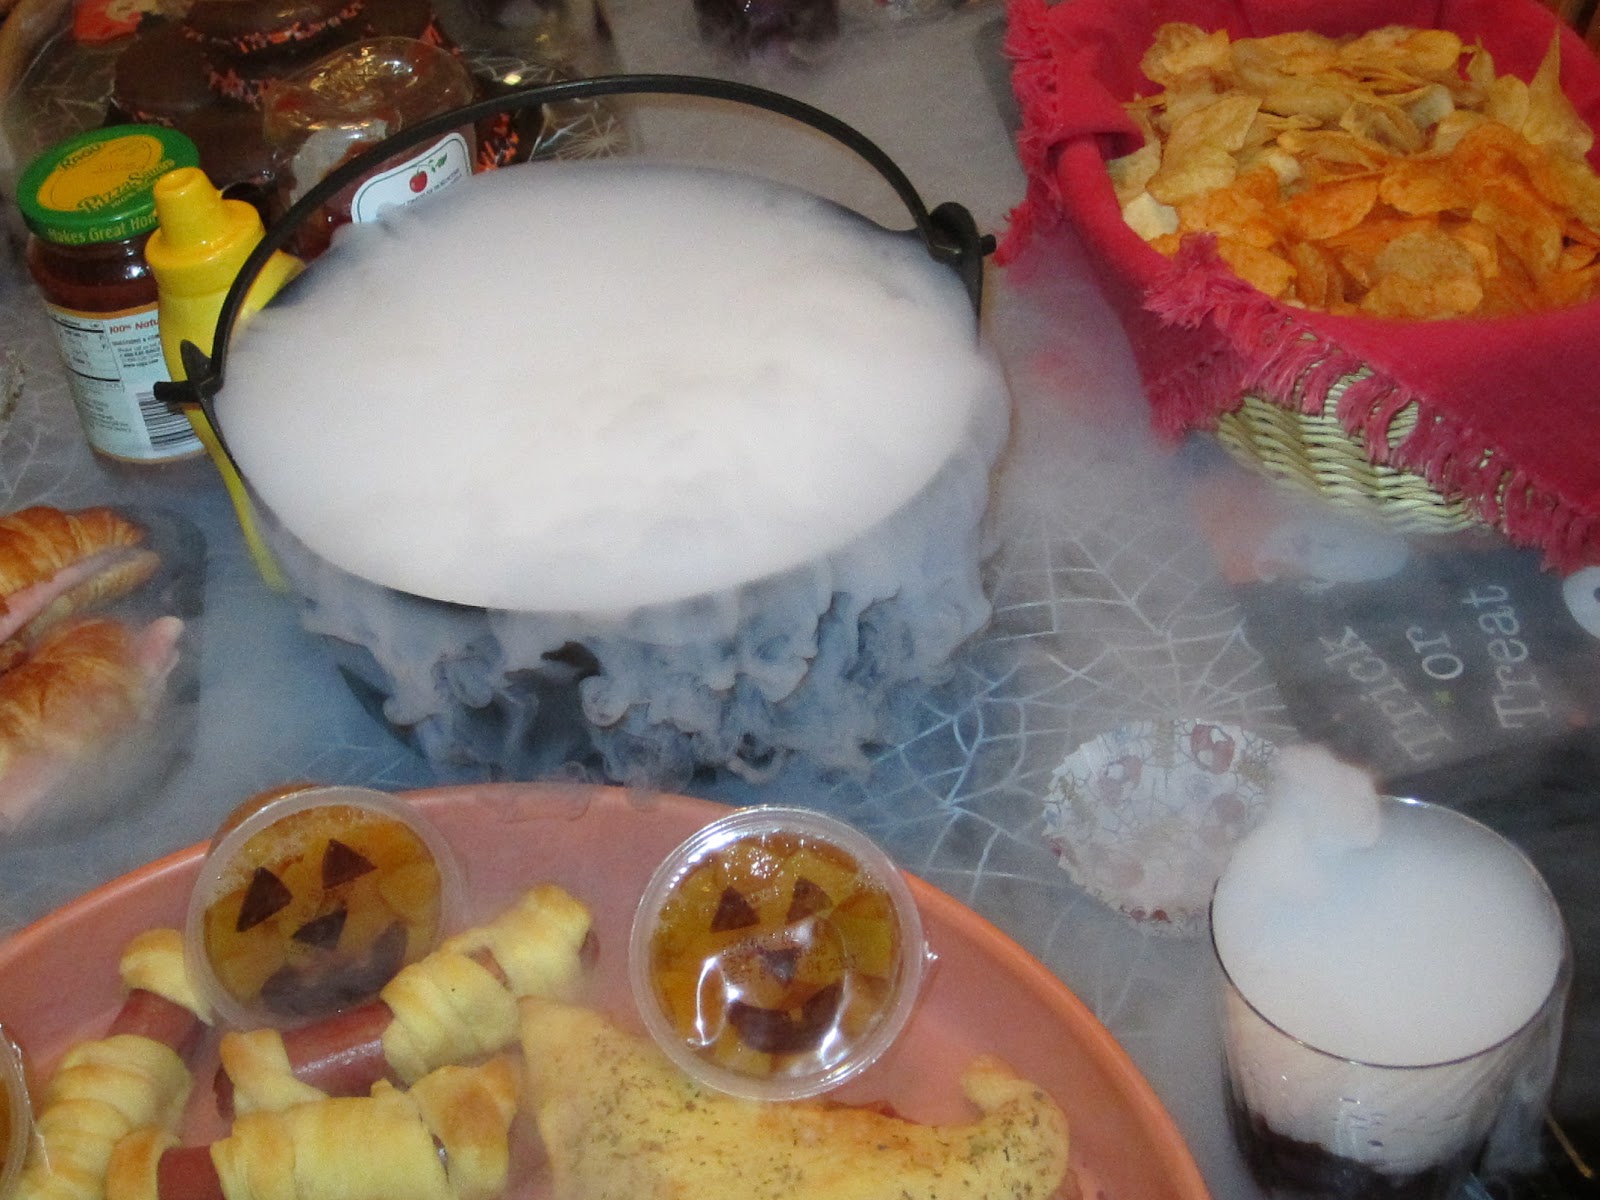
We had a Spooktacular Halloween this year, even though my little goblins were bummed because I told them they are now too old to go Trick or Treating. But it's ok, Pinterest and Nana to the rescue! 

Mummies in a blanket, witch hat pizzas, Jack-o-Lantern fruit cups

Bubbling cauldrons and Witches' Brew. Who knew they sold dry ice at the grocery store?!


Dracula made a guest appearance.

We even played Halloween bingo
and Stick the Spider in the Web!


If you want to see the recipes we used, they are all in my Halloween board on Pinterest.

Thursday, December 27, 2012

One Horse Sleigh

You know how it is. You need that perfect gift for your coworkers, your kids' teachers, the neighbors, etc. But you don't want to break the bank to make everyone feel special. I spent years trying to come up with clever gifts.

And then the internet invented Pinterest.

So when I found these on there, well you know I had to pin and make them! Here's my source pin.

You are going to need candy canes, a wide, flat, rectangular candy bar (KitKat works great - Hershey bars might work too), and some candies for packages. I used the Hershey Miniatures like my inspiration blogger did, but as I was making them I stated thinking you could probably use the Nuggets or maybe even some other mixed assorted candies. 

You also will need some ribbon or wide string and a bow or something to go on top. And an adhesive. I used hot glue. Some people have had success using glue dots (like for scrapbooking). I am cheap. I had hot glue on hand already and I was shelling out a lot of money for candy!


To do the sleighs the way I made them, you will need for each sleigh 2 candy canes, 1 KitKat bar, 10 Minis, 18" of ribbon, and a Hershey's kiss (to go on top).

First, glue the candy canes to the bottom of the KitKat. Leave the curves part out or your presents won't have room.

Now start layering your candies. I went with 4, 3, 2, 1. You could do 3, 2, 1 and it would still look pretty good and be a little cheaper in the long run.

I just put a little dab of hot glue on the bottom of each candy. I don't think they melted any. No one mentioned it if they did. If you got one of these from me and it was melted or ooky, leave a comment so we'll know!

I did put ribbon around these and glue a Hershey Kiss on the very top, but I forgot to take a picture. They turned out super cute though and I really liked them!